Creating a gift bag out of wrapping paper is a cost-effective, creative, and eco-friendly way to present gifts. This blog post will guide you through the process, providing tips and tricks to ensure your DIY gift bag is both beautiful and functional. Whether you're crafting for a special occasion or just want to add a personal touch to your gift-giving, this guide will cover everything you need to know.
Introduction: Why Make a Gift Bag Out of Wrapping Paper?
Creating gift bags from wrapping paper isn't just a clever DIY project—it's a sustainable and economical choice. Opting for homemade paper gift bags helps reduce waste, as you can repurpose wrapping paper that might otherwise be discarded. This approach is especially beneficial during holidays, where wrapping waste significantly increases. Additionally, by making your own gift bags, you save money on store-bought versions, which can be surprisingly expensive, especially for unique designs.
Customization is another major advantage of making your own paper gift bags. You can tailor each bag to fit the occasion or the recipient's personality. Whether it's a festive holiday design, a birthday theme, or something personal like a favorite color or pattern, the possibilities are endless. This personal touch not only makes the gift more special but also shows the recipient that extra care and thought went into their present.
Moreover, crafting these bags can be a creative outlet. The process of selecting the perfect paper, folding it just right, and adding finishing touches like ribbons or stickers can be deeply satisfying. It allows you to express your creativity in a tangible way, transforming simple paper into a beautiful and functional gift carrier.
Materials Needed for Making Paper Gift Bags
When crafting a paper gift bag, gathering the right materials is essential for a smooth process and a durable final product.
Essential Supplies
Wrapping Paper: Choose medium-weight paper for strength and ease of folding. This type ensures the bag holds its shape while still being easy to work with.
Scissors: Sharp scissors are crucial for clean cuts. Neat edges contribute to a polished look, which is important when you're aiming for a professional finish.
Tape: Transparent or double-sided tape works best for securing the sides and base. This helps in keeping the bag sturdy, especially under weight.
Ribbon: Ribbons add a decorative touch and serve as handles. Choose colors that either complement or contrast with your wrapping paper for added style.
Optional Additions
Cardboard: Reinforce the bag's base with a piece of cardboard, especially for heavier gifts. This added layer of support ensures the bottom doesn’t give way.
Decorative Items: Stickers, bows, and stamps can personalize your bag. These small touches make your handmade gift bag unique and memorable.
Hole Punches: Use a hole punch to create openings for the ribbon handles. This not only makes the bag functional but also adds to its aesthetic appeal.
Step-by-Step Guide: How to Make a Gift Bag Out of Wrapping Paper
Creating your own gift bag from wrapping paper is a fun and rewarding process. Follow these simple steps to craft a beautiful and functional paper gift bag.
Step 1: Measure and Cut the Wrapping Paper

Choosing the Right Size
First, lay your gift on the wrapping paper. Make sure to leave enough paper to fully wrap around the gift with a bit of overlap. The paper should be at least twice as tall as your gift to ensure the bag has a proper shape.
Cutting Techniques
Using sharp scissors, cut the wrapping paper to size. Clean cuts are essential for a professional finish. It's best to cut along the edges of a ruler for straight lines, which reduces waste and ensures the bag will fold neatly.
Step 2: Fold and Tape the Sides
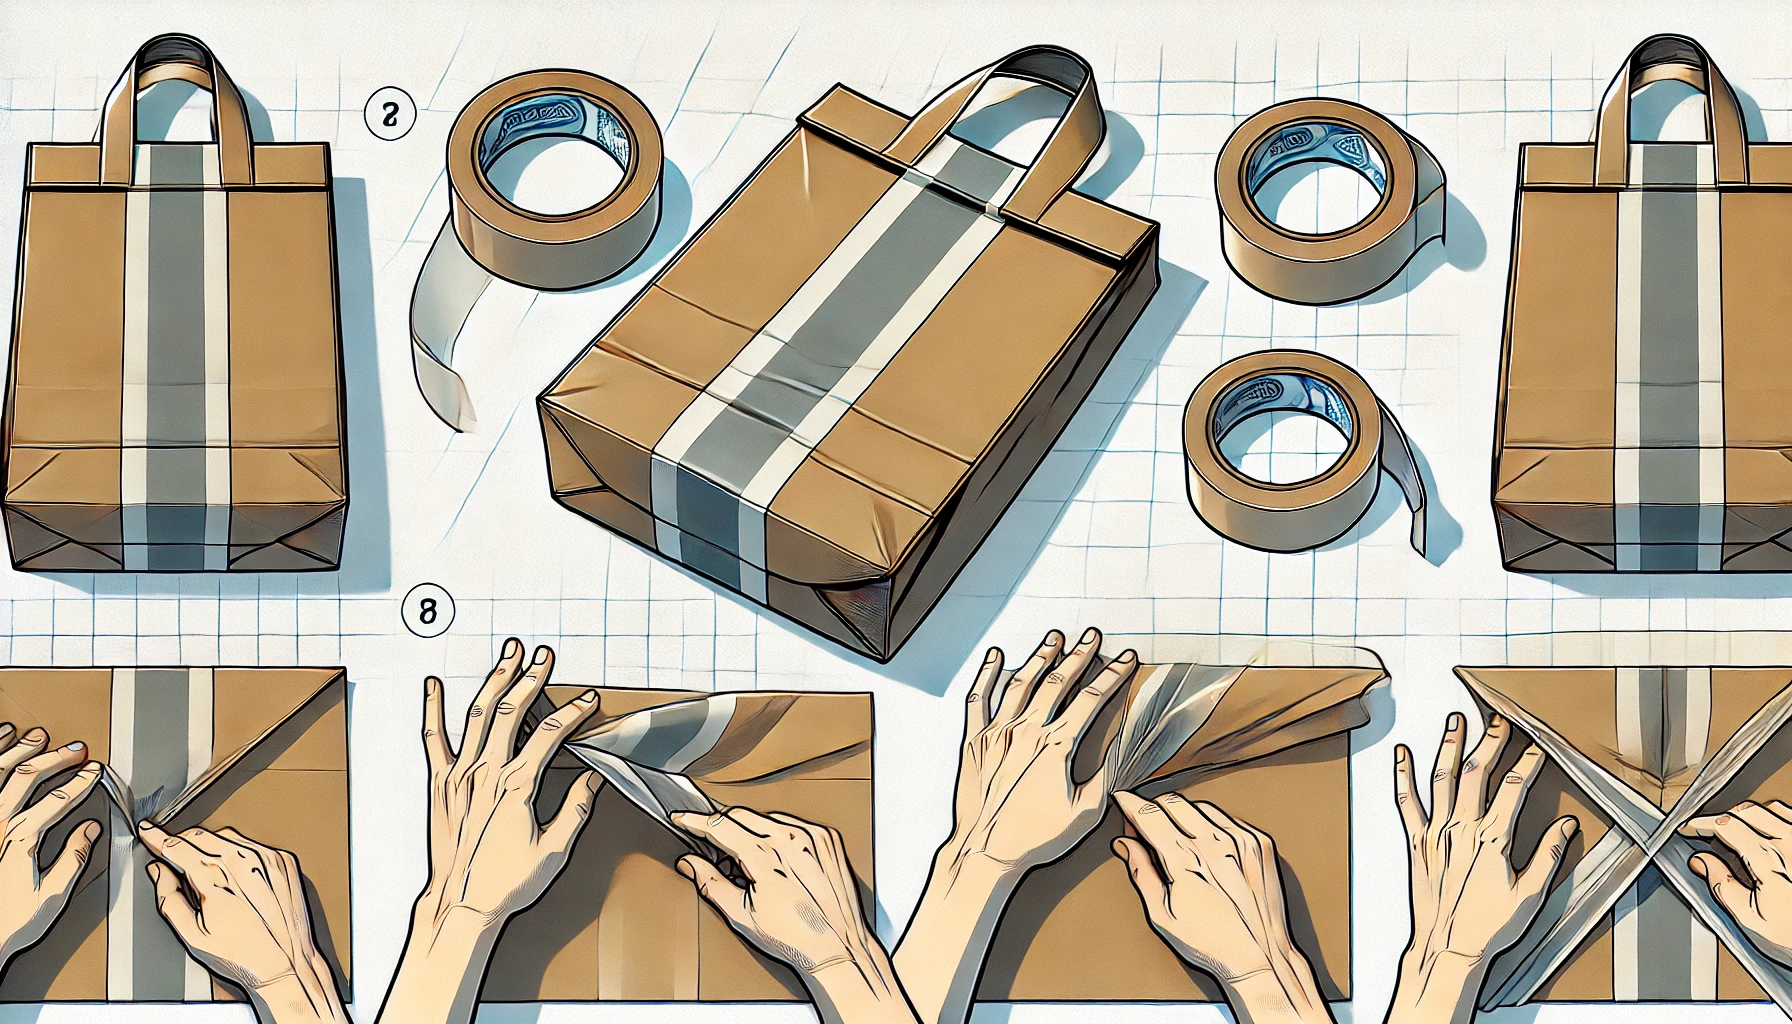
Creating the Main Body
Place the wrapping paper face down. Bring the sides of the paper toward the center, ensuring they overlap slightly. Secure the overlap with tape to form a cylinder shape. This will be the main body of your gift bag.
Neat Folds for a Professional Look
Make sure your folds are crisp and even. Use your fingers to press down on the paper, creating sharp creases. This attention to detail gives the bag a more polished, store-bought appearance.
Step 3: Forming the Bottom of the Bag
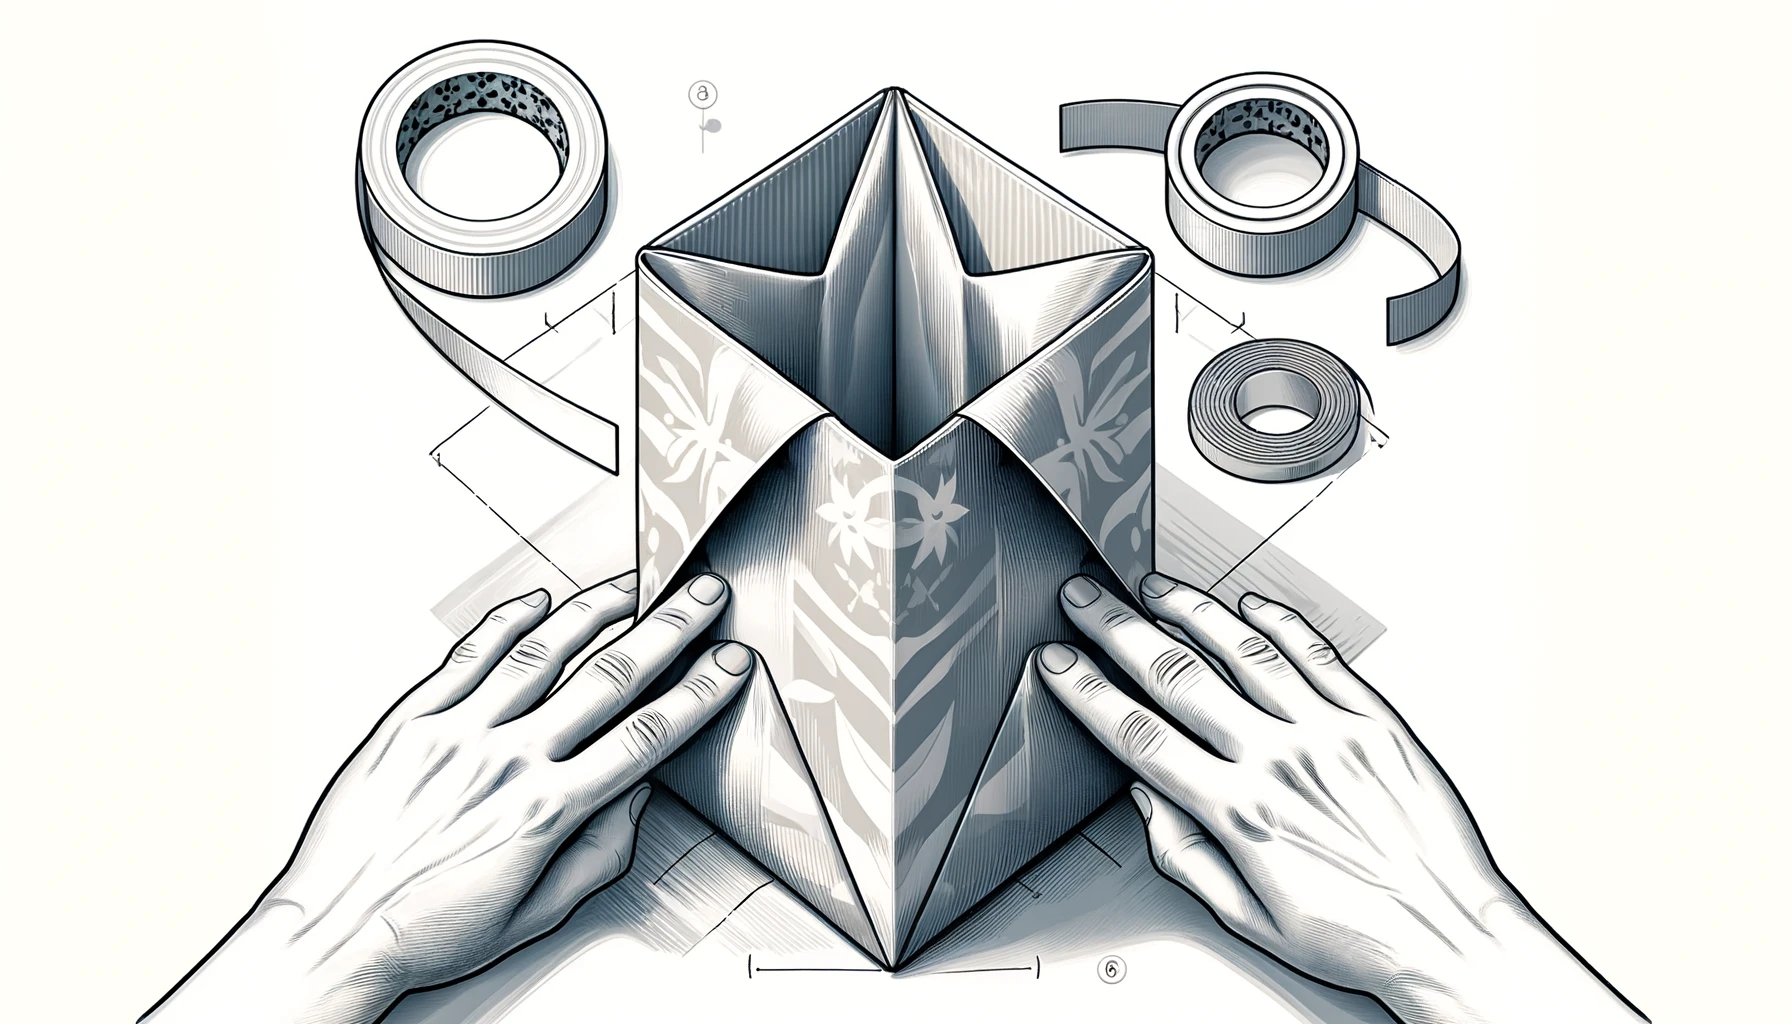
Folding the Bottom Edge
Next, fold the bottom edge of your paper cylinder upward to create a base. Open the folded edge, and press the corners inward to form a diamond shape. This will be the bottom of your bag.
Securing the Base
Fold the top and bottom points of the diamond toward the center, overlapping them slightly. Secure these flaps with tape to ensure the bottom is strong enough to hold your gift.
Step 4: Reinforcing the Bag (Optional)
Adding a Cardboard Base
For heavier gifts, consider reinforcing the base with a piece of cardboard. Cut the cardboard to fit inside the bottom of the bag, ensuring it lies flat against the bottom folds. This adds strength and prevents the bag from sagging.
When to Reinforce
Use reinforcement if your gift is heavy or if the wrapping paper is thin. A reinforced base makes the bag sturdier and more durable.
Step 5: Adding the Handles

Punching Holes for Handles
Punch two holes near the top of the bag, evenly spaced on each side. These will be for the ribbon handles.
Choosing the Right Ribbon
Select a ribbon that complements your wrapping paper. The ribbon should be long enough for comfortable carrying but not too long that it makes the bag awkward to hold.
Attaching the Handles
Thread the ribbon through the holes, then tie knots on the inside of the bag to secure the handles. Ensure the knots are tight so the handles stay in place.
Step 6: Personalizing Your Paper Gift Bag
Decorative Ideas
Add a personal touch by decorating your gift bag. Consider using bows, stickers, or stamps to make the bag more festive and unique.
Themed Bags for Different Occasions
Customize the bag for different events. For holidays, use themed wrapping paper and matching ribbons. For birthdays, consider adding a name tag or personal message.
Common Issues and How to Avoid Them
When making a gift bag out of wrapping paper, a few common problems can arise. Below are the most frequent issues and simple solutions to ensure your bag looks perfect.
Problem: Bag Tears Easily
A common issue is tearing, especially if the wrapping paper is too thin or the bag is carrying a heavy item.
Problem: Handles Come Loose
Handles can often come loose if not properly secured, especially when the bag is carried.
Solution: Make sure the ribbon is tightly secured by tying strong knots. Double-knotting can provide extra security. If necessary, use a stronger adhesive, such as a hot glue gun, to ensure the knots stay in place.
Problem: Uneven Sides or Bottom
Uneven sides or a lopsided bottom can make the bag look unprofessional and affect its stability.
Frequently Asked Questions About Paper Gift Bags
When making a paper gift bag, you might have some common questions. Here are clear answers to help guide your project.
What Type of Wrapping Paper Is Best?
The type of wrapping paper you choose is crucial for the durability and appearance of your gift bag.
Medium-Weight Paper: This is ideal because it’s strong yet easy to fold. It holds the shape well without tearing easily, making it perfect for most gift bags.
Decorative Paper: Choose paper with vibrant patterns or festive designs to match the occasion. If you need a sturdier bag, opt for thicker paper, but avoid cardstock as it can be too stiff.
How Much Paper Do I Need for Different Bag Sizes?
The amount of wrapping paper required depends on the size of the bag you want to create.
Small Bags: For a small bag, like one used for jewelry, you’ll need approximately 12x18 inches of wrapping paper.
Medium Bags: For items like books or candles, plan on using a 20x28 inch sheet.
Large Bags: Larger gifts, like toys or clothing, will need around 24x36 inches or more. Always ensure the paper can wrap around the gift with some overlap to accommodate folds.
Can I Reuse the Gift Bag?
Yes, one of the benefits of making paper gift bags is their reusability.
Durability: If you use medium-weight paper and reinforce the base, the bag can be reused several times. Just make sure to handle it with care, especially when removing items.
Storage: Store the bag flat to avoid creases or damage. This helps maintain its shape for future use.
How Can I Make the Bag More Durable?
If you need a sturdier bag, there are a few simple ways to reinforce it.
Reinforce the Base: Add a piece of cardboard to the bottom for extra strength, especially for heavier gifts.
Extra Tape: Use double-sided tape along the seams and base to prevent tearing.
Thicker Paper: Consider using thicker wrapping paper or even layering two sheets together for added durability.
Making your own gift bags allows for complete personalization. You can choose the colors, patterns, and decorations that match the occasion or the recipient's taste. This personal touch makes your gift stand out and shows thoughtfulness. Additionally, it's a cost-effective option. Instead of buying expensive store-bought gift bags, you can create beautiful and unique bags using materials you likely already have at


